This post may contain affiliate links which means I may receive a commission for purchases made through links.
Table of Contents
Preparation time: 2 hours
Baking time: 45-50 minutes
Serving size: 8 servings
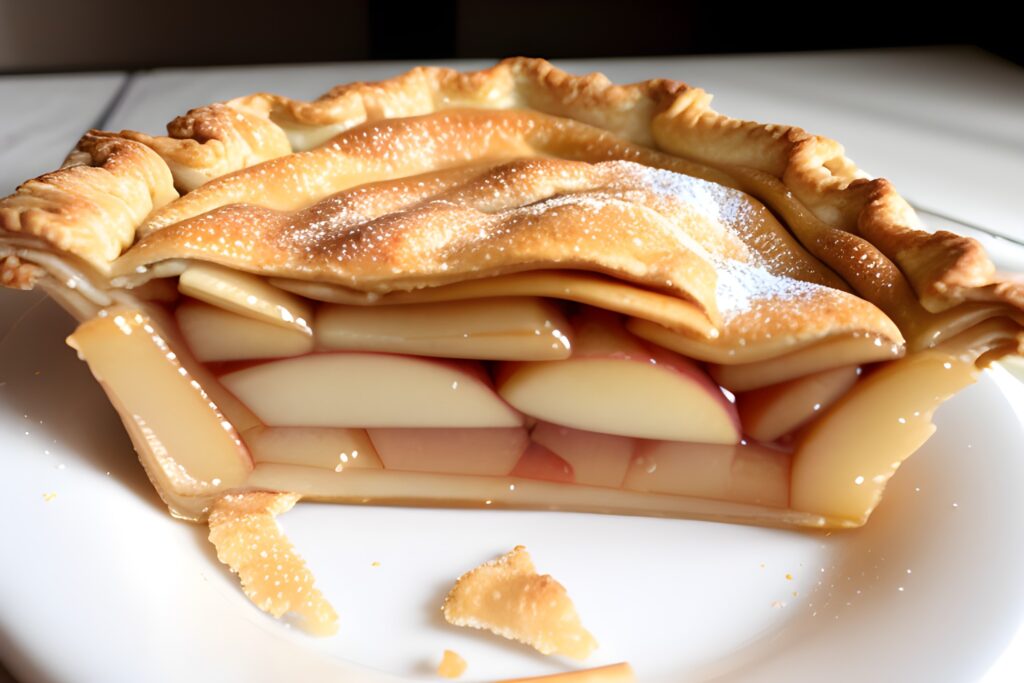
Baking an delicious American apple pie
Ingredients
American apple pie top crust
- 200 grams flour
- 3 grams or ½ teaspoon salt
- 30 grams sugar
- 130 grams unsalted butter
- 35 ml of cold water
American apple pie bottom crust
- 200 grams flour
- 3 grams or ½ teaspoon salt
- 30 grams sugar
- 130 grams unsalted butter
- 35 ml of cold water
American apple pie delicious filling
- 6 large or 8 medium apples (approximately 3 pounds)
- 75 grams unsalted butter
- lemon Juice of half a large lemon (about 25 ml)
- 180 grams brown sugar
- 1 teaspoon cinnamon
- 1 teaspoon corn starch
- ½ teaspoon nutmeg
Materials recommended to make the delicious American apple pie
- Food processor
- Plastic wrap
- silicon pastry mat
- 12″ pan with lid
- Rolling pin
- Kinfe or pizza cutter
- Fork
- pastry brush
- 9″ pie pan
- oven gloves
- oven
American apple pie crust recipe
Note: if you have a large processor, you can combine the ingredients for top and bottom crust to create the dough else, do them separately.
1. Let’s begin by creating a delicious crust for our apple pie. In a food processor, combine the flour, salt, and sugar. Give it a quick mix.
2. Cut the unsalted butter into small pieces and add them to the food processor. Pulse the mixture until it resembles coarse bread crumbs. The butter will be evenly incorporated, creating a flavorful crust.
3. Slowly add 35 ml of cold water to the mixture while continuing to mix. The dough will start to come together in chunks.
4. Transfer the dough onto a clean surface and shape it into a ball. Apply gentle pressure to flatten it slightly. Next, fold the dough to ensure an even shape.
5. Wrap the dough in plastic sheeting and refrigerate for about 2 hours. This chilling time allows the dough to relax, making it easier to handle and preventing shrinkage during baking. Repeat steps 1-5 to create the top layer for the pie.
American apple pie filling recipe
which apple to choose for delicious apple pie?
When it comes to choosing apples for apple pie, it’s important to select varieties that are firm, hold their shape well during baking, and offer a balance of sweet and tart flavors. Here are some popular apple varieties that are commonly used for apple pie:
- Granny Smith: Known for their tartness, Granny Smith apples hold their shape exceptionally well when baked. They provide a nice contrast to the sweetness of the pie filling.
- Honeycrisp: Honeycrisp apples are crisp, juicy, and slightly sweet. They offer a pleasant texture and a good balance of flavors in apple pie.
- Jonagold: A cross between Jonathan and Golden Delicious apples, Jonagold apples have a nice balance of sweet and tart flavors. They hold up well in baking and add a delicious taste to apple pie.
- Braeburn: Braeburn apples are firm, slightly tart, and have a hint of sweetness. They retain their shape nicely when baked and contribute a good flavor to apple pie.
- Fuji: Fuji apples are crisp, sweet, and juicy. While they are not as tart as some other varieties, they can still be used for apple pie if you prefer a sweeter filling.
- Golden Delicious: Golden Delicious apples are mildly sweet and have a soft texture. They work well when combined with other apple varieties in pie to add a delicate sweetness.
- Northern Spy: Northern Spy apples are tart and firm, making them a popular choice for baking. They hold their shape and offer a tangy flavor to apple pie.
you can also experiment with different combinations of apple varieties to achieve a desired flavor profile in your pie. Most people use a mixture of granny smith and honey crisp.
6. While the layer of the crust chills, let’s prepare the apples for the filling. Choose 6 large or 8 medium apples, totalling around 3 pounds. Peel the apples to remove the skin.
Should you remove apple skin for the filling?
The apple skin can have a slightly bitter or tannic taste, especially in certain apple varieties. Removing the skin can help eliminate any potential bitterness and allow the natural sweetness of the apples to shine through in the pie.
7. Now it’s time to decide if you prefer sliced or diced apples. The choice is yours! Whichever you choose, make sure to have the apples ready.
Should the apple be sliced or diced?
When making apple pie, it’s generally recommended to cut the apples into uniform slices or pieces that are roughly the same size. This helps ensure even cooking and a consistent texture throughout the pie. While there is some flexibility in the size, here are some guidelines:
- Sliced Apples: If you prefer sliced apples in your pie, aim for slices that are about 1/4 to 1/2 inch thick. This thickness allows the apples to soften and cook evenly while still maintaining some texture.
- Diced or Cubed Apples: If you prefer a chunkier texture or want to create a more rustic-style pie, you can dice or cube the apples. Aim for pieces that are around 1/2 inch to 3/4 inch in size. This size allows the apples to soften and meld together while baking.
In either case, it’s important to ensure that the apple pieces are not too large, as they may take longer to cook and may not fully soften during baking.
8. In a 12″ pan with a lid, melt 75 grams of unsalted butter over medium-low heat. Once the butter has melted, add the prepared apples and squeeze the juice of half a large lemon (about 25 ml) over them. Stir gently to coat the apples evenly.
9. In a separate bowl, combine 180 grams of brown sugar, 1 teaspoon of cinnamon, and ½ teaspoon of nutmeg. Sprinkle this mixture over the apples and continue to stir gently until everything is well distributed.
why you should use brown sugar over white sugar?
Using brown sugar in apple pie filling can significantly affect the flavor compared to generic white sugar. Here’s how brown sugar can impact the taste:
- Richness and Depth: Brown sugar contains molasses, which gives it a rich and deep flavor profile. When incorporated into the apple pie filling, the molasses imparts a subtle caramel-like taste, adding complexity and depth to the overall flavor of the pie. This can result in a more robust and flavorful filling compared to using plain white sugar.
- Warm and Buttery Notes: Brown sugar’s natural molasses content contributes warm and buttery notes to the apple pie filling. These flavors complement the sweetness of the apples and create a delightful balance between sweet and slightly savory elements. The result is a pie with a warm and comforting flavor profile.
- Moisture Retention: Brown sugar contains more moisture than white sugar due to its molasses content. As a result, when used in apple pie filling, it can help retain moisture and prevent the apples from becoming overly dry during baking. This can contribute to a juicier filling and help maintain the desired texture of the apples.
- Caramelization and Browning: The presence of molasses in brown sugar promotes caramelization during baking. This can lead to a deeper golden brown color on the crust and enhance the overall appearance of the pie. Additionally, the caramelized flavors can add a subtle richness and sweetness to the filling, enhancing the overall taste experience.
When substituting brown sugar for white sugar in an apple pie recipe, keep in mind that brown sugar has a slightly higher moisture content. Therefore, later while we are cooking the apples we will add 1 tablespoon of corn starch as a thickening agent..
why add nutmeg and cinnamon for the filling?
Mixing cinnamon and nutmeg with brown sugar is a classic and delicious combination for apple pie. Here’s why it works so well:
- Cinnamon: Cinnamon is a spice commonly associated with apple-based desserts. Its warm and aromatic flavor pairs beautifully with the natural sweetness of apples. When combined with brown sugar, cinnamon enhances the rich and caramel-like notes, creating a harmonious blend of flavors. It adds a touch of warmth, depth, and a hint of spiciness to the apple pie filling.
- Nutmeg: Nutmeg is another spice that complements apples exceptionally well. It has a slightly sweet and nutty flavor with subtle earthy undertones. When used sparingly, nutmeg can add complexity and depth to the overall flavor profile of the pie filling. It harmonizes with the sweetness of the brown sugar and enhances the warm and comforting characteristics of the pie.
By combining cinnamon, nutmeg, and brown sugar in your apple pie recipe, we create a flavorful spice blend that complements the natural sweetness of the apples. The spices add layers of warmth, richness, and complexity to the filling, resulting in a more aromatic and satisfying apple pie.
10. Cover the pan with the lid and let the apple mixture simmer for 10 minutes over medium heat. This allows the flavors to meld together.
11. After the initial 10 minutes, the apples would have released all its water content. Drain this liquid separately and give it a taste. Is it perfectly sweetened? Would you like a bit more spice? This is your chance to adjust the flavours according to your preference. make any final flavour adjustments before proceeding.
12. If everything tastes great, pour the liquid back into the pan and add 1 tablespoon of corn starch and start to mix it thoroughly. Once everything is mixed well add the apples back into the pan. Cover the lid and continue to cook on medium-low heat for another 10 minutes.
13. Once the total cooking time of 20 minutes is over, turn off the stove and allow the apple filling to cool down to room temperature.
14. Now, let’s move on to the softened crust. Take both dough packets out of the refrigerator. The dough will be firm, so apply gentle pressure with your hands against the roller pad surface to soften it up. Once it’s more pliable, start rolling out the dough.
Rolling out and placing the dough for a pie requires some care and technique. Here’s a step-by-step guide on how to do it:
- Dust the work surface: Lightly dust your work surface and rolling pin with flour. This will prevent the dough from sticking and make it easier to handle.
- Roll out the bottom crust: Take one portion of the dough and flatten it into a disk shape with your hands. Place it on the floured surface and sprinkle a little flour on top. Roll out the dough using the rolling pin, starting from the centre and rolling outward. Roll in one direction, then lift and rotate the dough slightly to maintain an even thickness and prevent sticking. Roll the dough until it’s about 1/8 to 1/4 inch thick and larger than your pie pan(keep in mind, the stretched dough should be able cover the depth of your pan)
- Transfer the dough to the pan: Gently lift the rolled-out dough using a rolling pin or by carefully folding it in half. Place it over the pie pan, ensuring it’s centered. Unfold the dough and gently press it into the bottom and sides of the pan, taking care not to stretch it. Trim any excess dough hanging over the edges with a sharp knife, leaving a slight overhang.
- Roll out the top crust: Repeat the rolling process with the second portion of dough to create the top crust. You can roll it into a round shape that matches the size of your pie pan or cut it into strips if you prefer a lattice or decorative design.
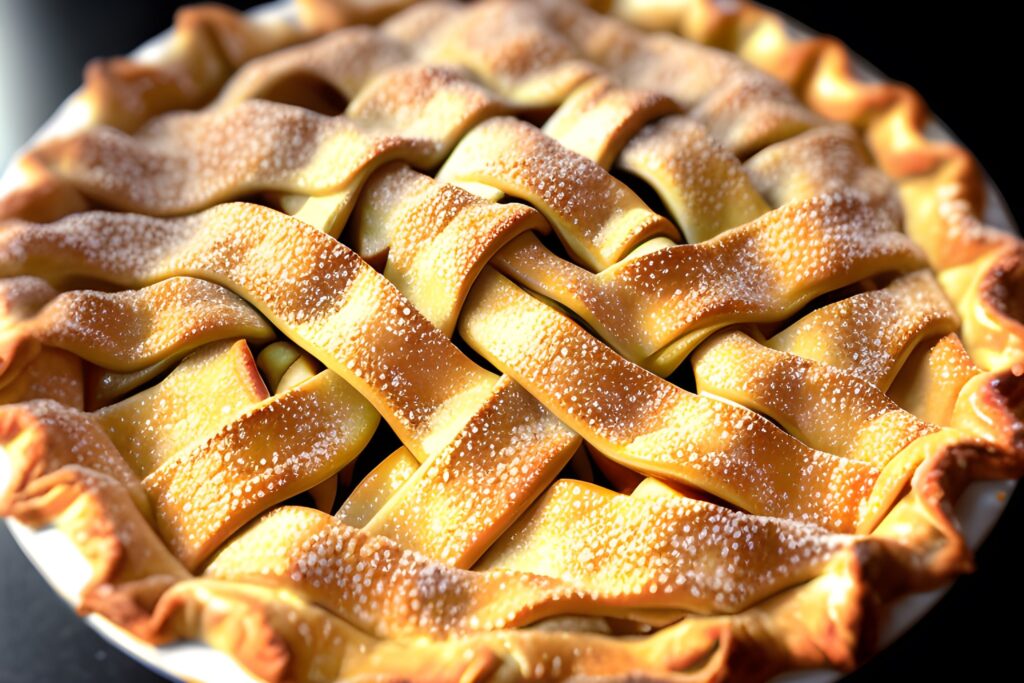
How to create a lattice design? a step-by-step instructions
Creating a lattice design on a pie involves weaving strips of dough over the filling to form a crisscross pattern. Here’s how you can create a lattice design on your pie:
- Roll out the dough: Prepare your pie dough and roll it out into a round shape according to your recipe. The rolled dough should be slightly larger than the size of your pie pan.
- Cut the strips: Using a sharp knife, pizza cutter, or a lattice cutter, cut the rolled dough into even strips. The width of the strips can vary based on your preference, typically ranging from 1/2 inch to 1 inch wide.
- Lay the first set of strips: Lay an equal number of parallel strips across the pie filling, leaving a small gap between each strip. These will be the base for the lattice design.
- Fold back the alternate strips: Take one strip and fold it halfway back towards the edge of the pie. Place a new strip perpendicular to the first set, slightly overlapping the folded strip. Unfold the folded strip back over the new strip. Repeat this process with the other alternate strips, folding them back and adding new strips until you have created a woven pattern.
- Repeat with the remaining strips: Now, take the parallel strips that were not folded back and repeat the process, but in the opposite direction. Fold back the strips, place a new strip perpendicular, and unfold the folded strips over the new strip. Repeat until you have woven all the strips into a lattice pattern.
- Trim and seal the edges: Trim any excess dough hanging over the edges of the pie pan.
15. Fill the pie: Add your desired filling into the prepared bottom crust in the pan. Be sure not to overfill, as the filling may bubble over during baking.
16. Place the top crust: If using a full top crust, carefully lift it with a rolling pin or by folding it in half and place it over the filling. If using a lattice design, create a lattice pattern by arranging the strips of dough in a crisscross pattern over the filling. Press the edges of the top crust onto the bottom crust to seal them together.
17. Crimp the edges: Using your fingers or a fork, crimp the edges of the pie to seal the top and bottom crusts together. This not only creates a decorative finish but also helps to prevent the filling from leaking out.
Brush with egg wash: For a shiny and golden crust, you can lightly beat an egg and brush it over the top crust
Baking an delicious American apple pie
18. Baking time! Preheat your oven to 400°F (200°C) for 15 minutes. Then, place the pie inside the oven and bake for approximately 45 minutes. Keep an eye on it as it bakes, adjusting the time as needed, until the crust turns golden brown, and the filling starts to bubble.
16. Finally, remove the apple pie from the oven and marvel at your masterpiece. Allow it to cool slightly before serving, and enjoy your homemade, mouth-watering apple pie!
Remember, baking is a delightful process, so have fun along the way. Enjoy the aroma of warm apples and spices filling and savor each bite of this scrumptious pie!
Congratulations!
You have successfully baked a delicious homemade American apple pie.
Happy eating!